Today I will be looking at a way to perform a flash drive repair that can be performed on flash drives that the USB end that fits into the computer has broken off or has become loose or partially broken off. In these cases the USB flash drive will stop being detected or popping up on your computer and you will be unable to access the data that stored on the flash drive which in most cases is really important data that you need or cannot manage to lose.
Which devices this will work on?
This fix will work on any brand of USB flash drive or junk drive that you may have that has stopped being detected by your computer as the USB end that fits into your computer has become loose or has broken off completely.
What will you need for this Fix?
To perform this fix you will need all of the following without exception:
1. The affected USB drive
2. A Soldering Iron
3. Solder
How to fix flash drive?
To fix flash drive you will need repair the damaged USB connection on the Flash drive by reconnecting the broken connection points on the Circuit board to the USB tip.
1.The first thing you will need to do is get the damaged USB flash drive and open it up. It may seem like it can’t be opened but it’s simply two halves joined together try opening it along the seams.
2. Once it opened you will notice the USB tip and the Circuit board, inspect and see if the USB end is completely broken off as it most cases where it was only keep in place by the flash drive case.
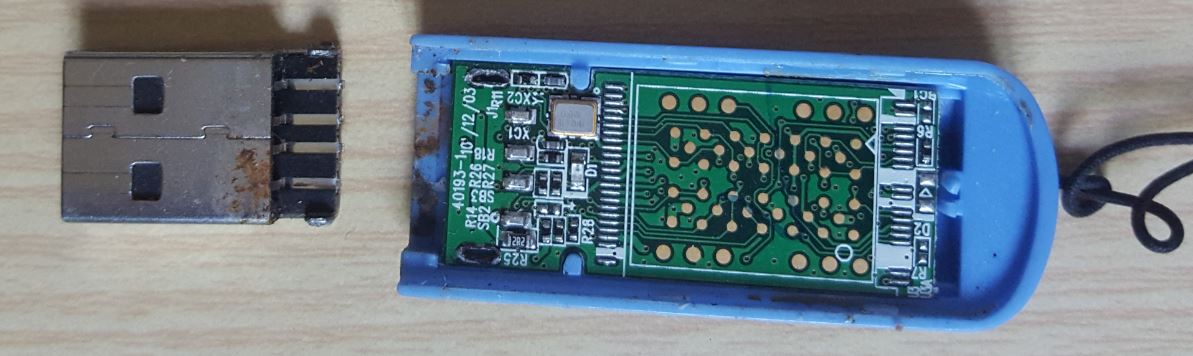
3. You will now need to find the connection points on the flash drive of which there are usually 4 with corresponding section on the USB end and on the flash drive circuit board.
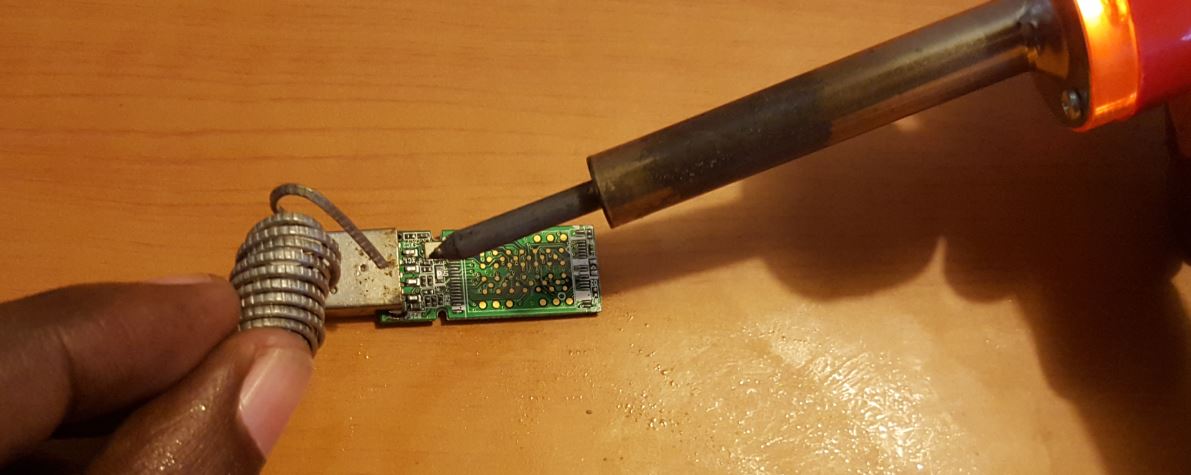
4. You will need to put back the USB head in place where its making contact and solder the 4 main points back in place with a fine point soldering iron very carefully while only connecting each of the four connection to there corresponding sections on the circuit board and make sure they don’t touch or ground when soldered back into place. The solder will bind the broken connections and allow power and data to follow as if the flash drive was not broken.
N.B. In some cases if directly soldering the connections back is too difficult for you then you can try getting 4 lengths of wire (insulated) and solder all four pieces at both ends and bridge the connection in case the above method is too hard.
5. Once everything is completed and you have soldered the USB end back in place perfectly. Go ahead and connected it back to the computer carefully it should start reading if you did the soldering correctly and mended the broken pathways.
So back up your data when the flash drive starts reading, the reason for this is that due to the current fragile state of the flash drive rescuing or recovering your data is all you can do now. I suggest that you store your files on a computer and get a new flash drive and place the data on it and that’s it.
I hope you found this tutorial helpful and please leave a comment below and ask any question or share your story as it might help another user. As always please also subscribe and do check out more tutorials and articles.