I thought I would be start doing more disassembly and repair videos. With that been said I would like to look at how to do a Doogee Dagger DG550 disassembly and LCD replacement. This will be a step by step tutorial and include a detailed video guide. You can follow along and will included details on everything that you need to complete the process. The specific device I will be replacing the LCD for is the Doogee dagger DG550.
What will you need for this repair?
For this repair you will need the affected Doogee dagger DG550 with broken or defective LCD or screen.
1. A screwdriver tool kit.
3.A clean Work surface.
A note of warning be sure to buy the entire LCD for this phone which included the digitizer. The assembly is black as shown in the pictures. Do not make the mistake of buying the digitizer alone that cheaper and shows as clear see through instead of black as it missing the LCD. You could buy just the digitizer and change that if that whats broken but changing it is a hassle and it better to get the whole LCD assembly.
How to disassembly and replace the LCD of a Doogee dagger DG550?
To start of make sure you have a clean and flat surface to work with.
1. Power the phone off and turn it over on the back. Remove the back cover and the battery. Also remove the SD card and SIM.
2. Start removing all the screws that are found around the edges and back of the device.
3. When screws are all removed clip off the top and bottom of the phone,there is a plastic cap at both ends. A smaller one at the top and larger one at the bottom. At the lower section with the lager plastic cap there are 2 hidden screws remove them.
Separate the two halves of the phone at the seams.They will separate easily as long as all screws are removed.
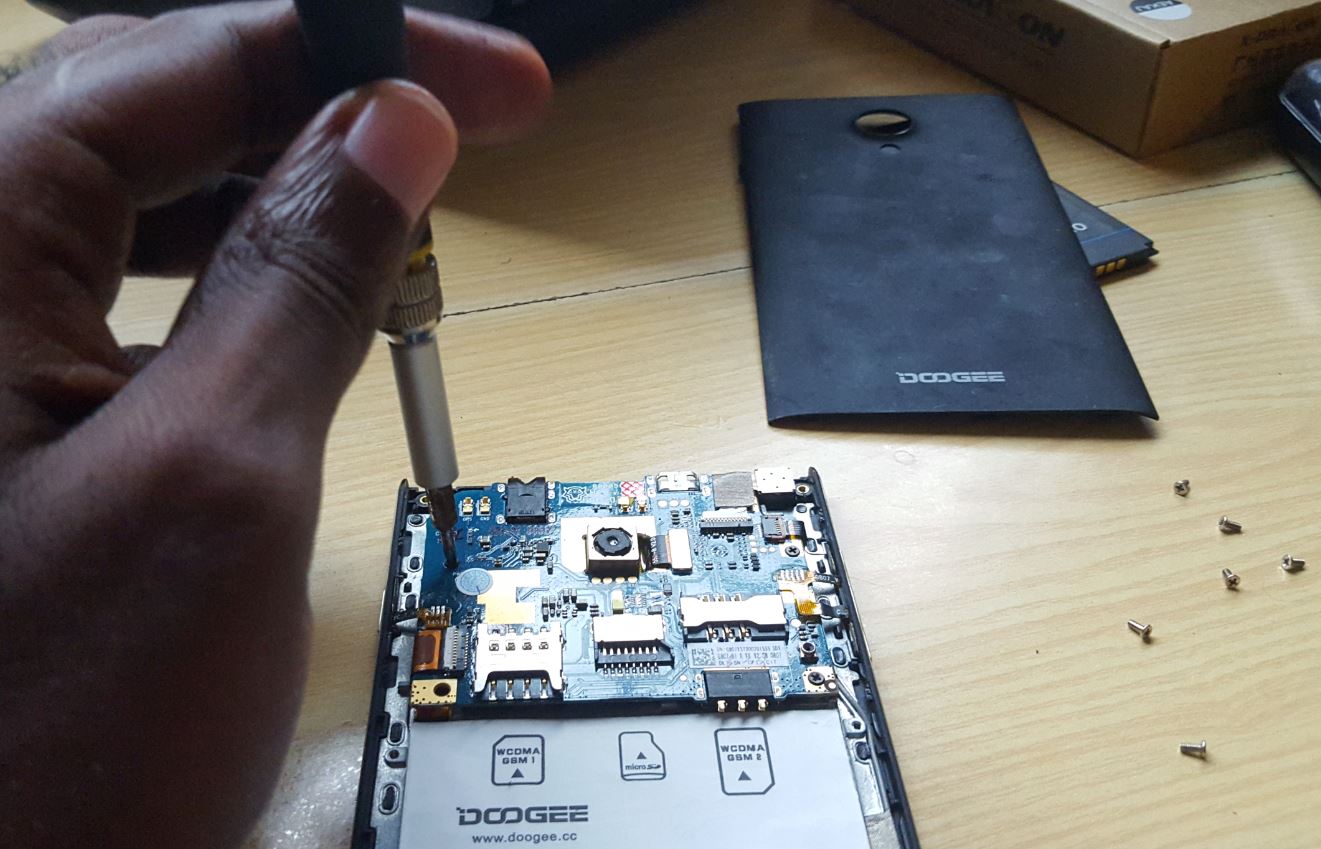
4. Remove the three screws that hold the upper circuit board in place. Disconnect the camera module its clipped into position and will snap off. Disconnect the 2 ribbon cables one on the right and the other on the left. To remove simply flip the black and white clamp on either side and flip-up with a forceps and slide the ribbon looking connector out.
5. Flip the circuit board over and then flip the entire phone. The broken LCD on the front will come right off. Simply replace with the new one. Slide the connectors through the openings and start reconnecting the ribbon cables. Simply place everything back in place in reverse and reassemble the phone.
Go ahead and test your new screen. If everything is connected properly it should work. If something is not working do not panic. Simply disassemble and fit things together carefully again.
Tips for you
1.You can always take pictures at each stage to remember what goes where. This will make sure you don’t miss place everything.
2. Follow along closely in the video and you can always ask your questions here or on the video.
3. Don’t force any of the components loose with excessive force.
4.Insulate yourself so you don’t damage any of the sensitive components in your phone while you work due to Electrostatic discharge.
5.Take your time and be patent.
I hope you were able to successfully perform the Doogee Dagger DG550 disassembly and LCD replacement. Let me know how things turned out for you below in the comments. Also please share this article with a friend or two on social media, it would be greatly appreciated.

This was really helpful! But it would have been nice if you could have shown how exactly you removed the clear digitizer part from the solid LCD screen. And also how you removed the digitizer ribbon cable from the device (it is glued down pretty good)