Ever wished you could browse the internet a little bit faster or stream online content consistently without the video becoming very choppy, especially when you know your internet connection should be able to handle it? Well you can actually Increase internet speed without getting a new data package by using a free DNS Server from Google or Open DNS. Yes you heard me correctly this is all free and will not cost you a dime of your hard earned cash.

Boost the speed of your Internet Connection
What is a DNS and how will this Increase internet speed?
The acronym DNS itself stands for Domain Name Server and put simply or basically is the system that handles website addresses when you type in a host name for a website into the address bar, the DNS similar to a telephone directory matches the Host name with the specific IP address of the website and off you go. If you know the IP of a website it can take you there directly for any website but no one really likes remembering long strings of numbers, thus DNS was created.
The default DNS servers of your Internet service provider is usually handled by your ISP themselves or your router. In most case this is not too reliable, the smart thing to do would be to switch to one run by the likes of Google or Open DNS which are much more reliable. In most cases these DNS servers can dramatically improve your internet speed and your streaming services on which you watch lots of video.
How to actually setup a DNS server on your computer?
To setup a DNS server follow the instructions below, we will be using Windows 8 as platform for this Demo:
1. From the charms menu that pops out of the right go to settings and the select control Panel.
2. Find network and share center and in the left panel select change adapter settings.
3. You should see your connection in the accompanying menu, in my case its the Ethernet adapter, it may be the same for you or say wireless.
4. Right click and properties and the following menu should pop up:
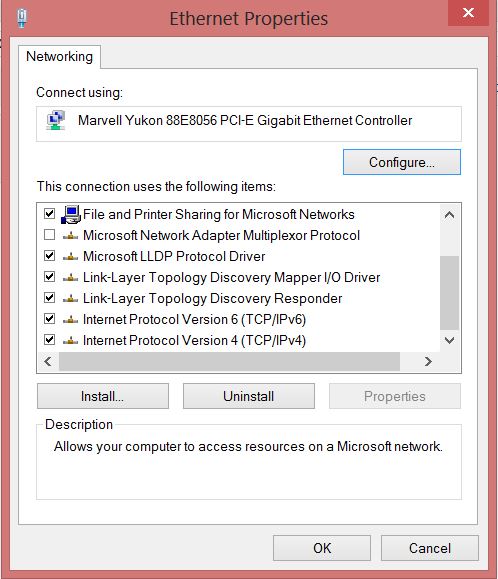
Ethernet Adapter Properties
5. Scroll down and find: Internet Protocol version 4 (TCP/IPv4) and Internet Protocol version 6 (TCP/IPv6). We will be using both later on.
Using OpenDNS Settings
OpenDNS DNS settings are as follows:
- 208.67.222.222
- 208.67.220.220
To use the above setting Select:Internet Protocol version 4 (TCP/IPv4) and properties and switch the setting from obtain DNS server adress automatically to: use the following DNS server addresses as seen below:
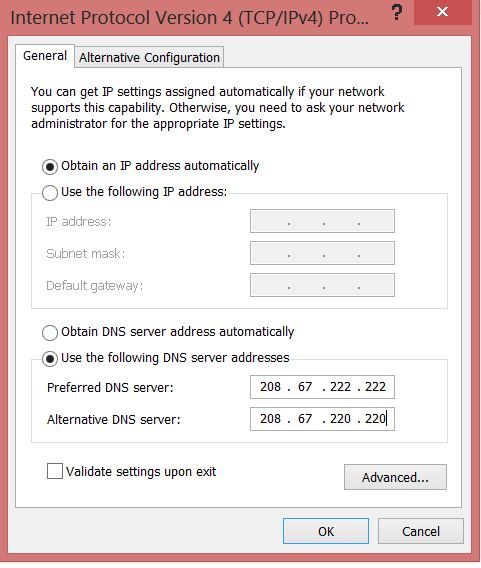
OpenDNS.com Settings IP version 4
That’s it simply press OK once the numbers are correct you should be good to go, to fully implement restart your internet connection and computer. Be sure to test if you are browsing properly and streaming video better. If the above is giving issues check the numbers and make adjustments. In case this one did not work simply reverse the process and undo the settings you have input above and try the DNS servers of Google below.
Google DNS Servers settings
This time with the Google DNS settings you will be setting both :Internet Protocol version 4 (TCP/IPv4) and version 6 (TCP/IPv6). The DNS servers are as follows:
IP Version 4
- 8.8.8.8
- 8.8.4.4
IP Version 6
- 2001:4860:4860::8888
- 2001:4860:4860::8844
Select: Internet Protocol version 4 (TCP/IPv4) in the screen as seen in the screen shot of #4 above and select properties and fill in IP Version 4 settings as seen below and press OK:
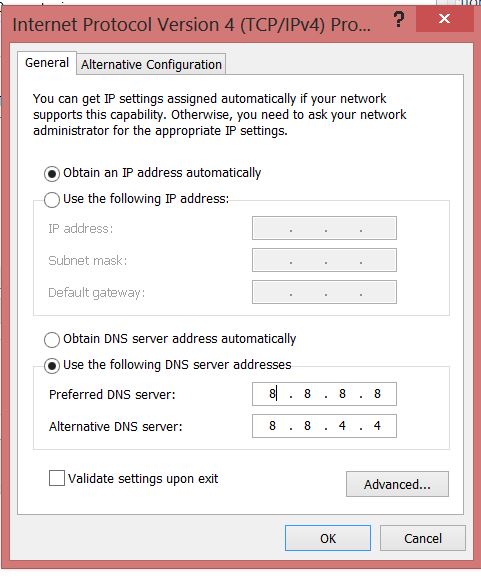
Google IP Version 4 DNS Settings
Next Select: Internet Protocol version 6 (TCP/IPv6) in the screen as seen in the first screenshot of point #4 above and select properties and fill in IP Version 6 settings as seen below, remember to set the options to use the following DNS server Addresses:
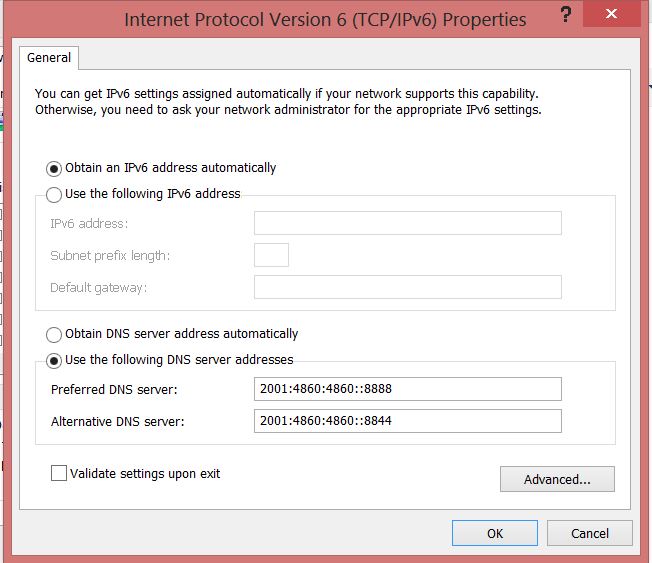
IP Version 6 DNS Settings
Once more press OK and that’s it, as always reset your computer and modem and test, you will have to see which works best for you. And remember you can always revert by removing the settings and going back to the defaults.
I would love to know how this works for you, depending on your location and internet service provider this might have different effects on your browsing and video streaming experience. So go ahead and leave a comment and I will be sure to respond to each and every one. Also note that this will work on any version of windows, its a simple matter of finding the settings.