
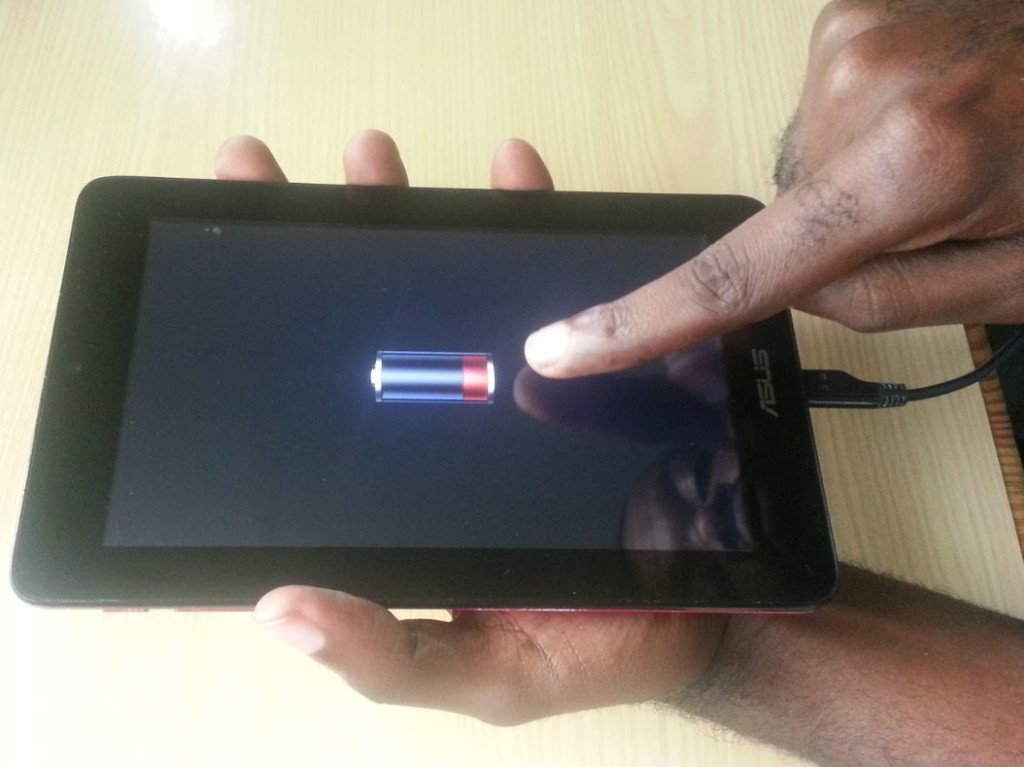
In today’s article we will be looking at an issue where the Asus Memo Pad wont turn on or charge and when you plug in the tablet on-screen you will see a red battery icon that displays for a while then disappears as the tablet will shout off. This is often the last thing that you would want to happen to your tablet but things like these do happen and guess what I am here to tell you that we can help you in fixing your tablet and getting it back to working condition in no time, so simply follow our tutorial and watch the video for direct instruction on repairing your device.
Description of the Asus Memo Pad wont turn on Issue
When this problem occurs you will notice that your Memo Pad will not power up and instinctively you will plug your device in for charging, only to notice a Red battery icon, this read battery icon will then disappear in a few seconds and the tablet will power off and the device will not charge at all. You will still be unable to power the tablet up and disconnecting and reconnecting the charger will only cause a repeat of the situation we just described to you.
What Causes the issue?
The issue of your Asus Memo Pad not charging is caused by in most cases the battery been totally drained, then this may trigger the issue you are experiencing or as far as we have seen that this can affect several tablets and simply just occur with nothing triggering it. The issue can occur In the Asus Memo Pad line of tablets or even other brands,so as long as you own a Asus Memo Pad this issue will most likely eventually surface and happen to your tablet.
What devices does this issue affect?
This problem affects the ASUS MeMO Pad ME172V, ASUS MeMOPad HD and any other device like it in the Asus Memo Pad line, it’s even possible that other brands may be affected by this problem. So if you are experiencing a similar issue despite your device model or brand be sure to give this fix a try.
How to fix the Issue of the Asus Memo Pad wont turn on or charge with red Battery icon Fix
OK let’s get started, in order to fix the issue you will need to open your Asus Memo pad. To do this you will need a tool set as the one shown below that was designed for opening phones but it will work just fine with a tablet, also I will place a link to the tool set in case you will need a pair of your own to purchase, but if you do not want to do that a blunt tipped object will work fine.

[easyazon_link asin=”B00E3CHLLC” locale=”US” new_window=”default” nofollow=”default” tag=”blogtechtips.com-20″ add_to_cart=”no” cloaking=”default” localization=”yes” popups=”yes”]Get your tool set here![/easyazon_link]
1. From the lower end of your Asus Memo Pad where the charge port is, insert the plastic forceps or blunt object and gently but firmly try to separate the seems that hold the tablet together, run the tool along the edges until the entire thing separates into two halves. Be careful not to snap the plastic clips that holds the back of the Memo Pad on as you will need to close the unit later.
2. Inside the unit should look like this:

As you can see there is a battery and its connected to the circuit board or mother board of the Memo Pad.


3. Now gently without touching the components of the board, disconnect the battery from the motherboard, using a fine tipped flat head screw driver to gently pick it from its socket should be enough to dislodge the connector. You may want to clean this tip or blow away any dust that might have settled on it.
4. Now simply reconnect the battery and plug your adapter into the Memo Pad. It should now boot up fine:

5. Congratulations you have successfully repaired your tablet as it should boot up, now power down the Memo pad and replace the back cover which will snap back on, your repair job is now finished.
Video Instructions on how to Fix the Issue
Why does this work in fixing the issue?
Seems the battery runs into an issue where it cannot calibrate itself and refuses to power the tablet,so only removing it from the circuit board and re-attaching it can fix the issue. Doing this seems to force the tablets system to recalibrate and re-accept the battery.
If you have any issues or need help simply leave a comment below and we would be glad to assist in any way possible together we can make this article in a great resource to help others that are having the same issue.


🙂 How well did I do? Take a moment to leave a comment.