This guide or tutorial will fully walk you through the process of How to fully Disassemble and Replace Acer Aspire E 15 Keyboard. By the end of this Guide you should be able to replace a damaged Acer Aspire Keyboard (Ones buried deep in the Laptop.
As a result of the way this Laptop is setup this guide also doubles as a Full Disassembly guide to show you how to pull this Laptop or any similar Laptop apart and to Chane a Keyboard or any other Part such as Motherboard, Hard dive, Heat Sink,Battery, speakers and so much more.
How is this Useful?
This guide is useful if:
- Your Acer Aspire Keyboard is damaged and need replacing.
- Your Laptop wont turn on Unless you are holding down certain keys or Wont turn off as well without holding certain keys in some cases.
- You need to replace any Part of your Acer Aspire or other Laptop such as the Keyboard, Hard Drive, Motherboard, Battery, RAM etc.
What You will Need:
1.You will need a Multi-Screwdriver set.
2.Replacement Part or Keyboard that matches your Laptop.
3.Free Time
4.This Guide.
How to Match Keyboard for Replacement?
Go ahead and follow the guidelines below to perfectly Match your Keyboard.
1.Search on Amazon or other similar website: “Your Specific Model Laptop” Keyboard Replacement. In my case my laptop was a Acer Aspire 15 E5-576-392H. Some times a partial match is enough such as the product listing indicates it works for Acer Aspire 15 E5-576 Series or something like that.
2.Make sure the Drawing matches the Laptop Keys Layout and Keyboard type. Make sure Connectors, special keys and so on are in the right place if you know what it should look like for the connector.
3.Contact the seller and ask direct Questions if you can. Including if it will work.
Once you are satisfied you can order your Keyboard. This is the Keyboard I ordered as shown in the Video for my Acer Aspire 15 E5-576-392H.
Pro Tip:
At every stage of the disassembly or process take a detailed picture or video so you can refer to later to remember what goes where in case you get confuse or flat out forget.
How to Replace Acer Aspire Keyboard or Disassemble:
The video below will show you exactly what to do step by step. I have also written out the main directions. I recommend the video though for the greatest detail.
1.Go ahead and power off your Laptop. Its off when the Fans are not running, no LEDs are seen on the sides front or back and the screen is blank.
2.Turn the laptop over and remove all the screws on the edge of the Laptop.There should also be a back cover that’s screwed in place remove that first. There should be some hidden screws beneath that.
3.There are three small hidden screws under the DVD drive bay that you just removed at the outer edge. Remove the DVD drive it should slide out. Remove the entire back cover it should separate now.
Watch out for the speaker cables that attaches the back to the Motherboard remove the clip to fully separate.
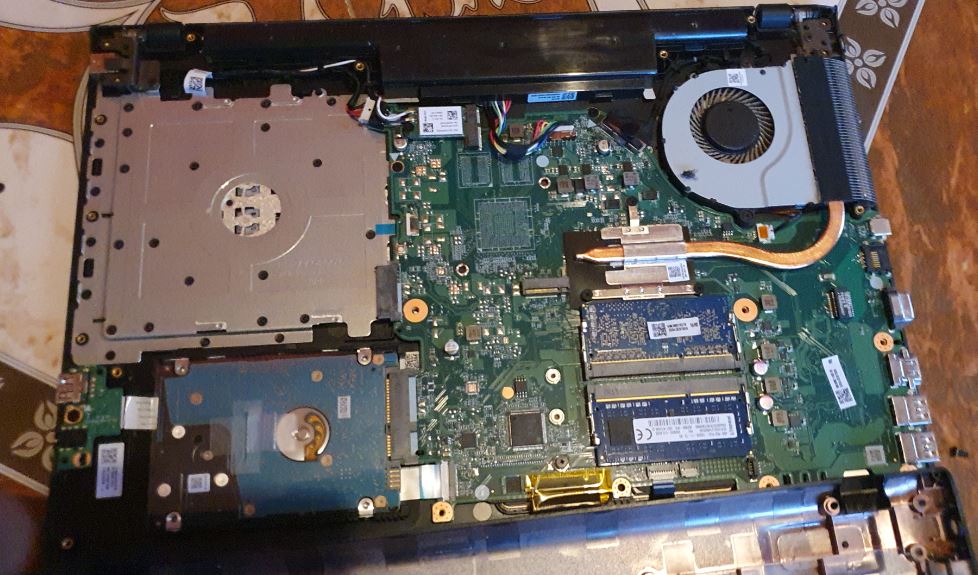
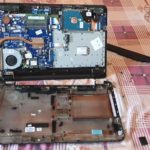
4.Remove all the attachments on the Motherboard. This includes: Touchpad,Keyboard connector, Power, battery, CPU Fan and any other connections that removable on the board. Remove the two screws holding the board in place.
Remove the battery after disconnecting, remove the Hard drive, remove the Fan from the heat-sink there are two screws holding it in place-remember the connector on the board.
5.Under the Hard drive there should be a connector for some ports to the left disconnect as well. Once all connections have been removed remove the Motherboard.
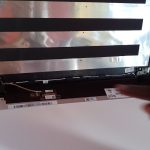
6.Remove the black Antiseptic shield black plastic beneath Motherboard. Now carefully locate the Plastic grommets on the metal shield above the keyboard.
Use the Flathead screwdriver to remove each grommet one at a time until they are all removed.The heads will need to be broken off one by one. They are allot and make sure you get them all.
7.The metal plate will remove after all the grommets heads are removed. Lift the metal plate and you should see the keyboard remember the two screws left and right in the Hinges on both sides. Some extra Grommets may hold the Keyboard itself in place to remove top center.
8.Remove old Keyboard and set new one flush in place. If you have a glue gun or something similar that could act as the grommets use that otherwise it should be fine to reassemble without the plastics to hold it in place.
9.To fit everything together again follow the directions here in reverse. You could also simply reassemble if you remember everything you did until now.
That’s it guys after re-assembly simply power on the Laptop to make sure it boots up fully. Test speakers, touch pads, text input or typing and everything.If all is well that’s it you are done.
If there is a issue or something is not connected properly you will have to go back and check your connections and to make sure everything is connected properly. A single loose connection could result in display, Keyboard or something else either not working or behaving abnormal.
Have a different type of keyboard than the one shown here then check out our guide on how to change that one here.
One more thing
Before you go share your thoughts below, ask for help or check out some more guide I have a whole lot of them trust me on that. Thanks for checking out the guide.